Thursday 20 September 2012

BARGAIN heels

This week I was looking for a pair of black heels, Blue Inc. was nearby and although I do not usually shop in there I thought I would take a little look.

I was very impressed with their range of shoes and found the perfect pair of black shoes with a wooden block heel (my favourite)...THEN I SAW THE PRICE!


£11.99...surely not?

Taking the shoes to the till thinking there must be some mistake, I was shocked to learn that they were actually £11.99. At this price I couldn't pass up getting the stone colour as well.

To make my day EVEN better, I even got student discount on top of the already ridiculously low price.

All in all this was a good day for shoe shopping, now I just need an opportunity to wear them!

Thursday 13 September 2012

Nail Designs

Rather than doing a million posts of all of the nail designs I have had recently (and there are quite a few) I thought the best way to show them to you guys was through a collage.


All of these designs were done by myself either using my own nails or my friends (my personal guinea pig.) I hope you find them as exciting as I do! Feel free to let me know if you would like to see any 'how to' posts on any of the designs.


Enjoy x

Wednesday 1 August 2012

Glitter Fade Nails


I have a whole bunch of nail designs that I have done the past few months which I am going to blog about, but I got a tad excited about my latest set of talons that I had to share them now!

I had seen that ombre nails were the next big thing so thought I’d try my hand at it but instead using glitter for the ombre effect.


To be honest, it is not as tricky as it looks (I think the fact that it was glitter helped).

What I used for this design:
  • ·         Elf Dark Red polish
  • ·         Elf Golden Goddess
  • ·         Dark Gold Glitter Nail Art Pen
  • ·        Glitter Pieces (stars)


Once I had done all the boring prep stuff, I applied two coats of the Elf-dark red polish to all of my nails and left them to dry (5-10 mins). Next, there is no accuracy needed for this part but simply apply 1-2 coats of Elf-golden goddess to the top third of the nail. Once this had dried on the top end of the nail, I applied the dark gold glitter which was a lot thicker in consistency than the ELF polish. I tried to ensure that this part was solid glitter and that none of the red was showing. I blended the glitter down slightly (about 2/3rds) to create the ombre seamless effect. Whilst the varnish was still stick I simply used my tweezers to place the loose glitter stars on the nails where I wanted them. Finally, I applied a top coat and VOILA!


I have also done the same to my toes but using nude polish and blue glitter, however I am going to save you all the horror of posting a picture of my feet!

I hope this has been helpful and I would love to see some ombre designs that you guys have done, plus any tips and tricks you may have!


Friday 13 July 2012

I AM BAAAAAAAAAACK!


So, it has been months since I have blogged, definitely need a slap on the wrist. With finishing my final university projects, going on holiday, work and sorting my work experience’s in PR for summer (if you can call it that) my life has been pretty hectic!

Moving on to the FUN part of my summer, I went on the highly anticipated girl’s holiday!

Ayia Napa seemed to be this year’s BIG HOLIDAY DESTINATION next to Ibiza, but let’s face it, I’m a student, and I can’t afford Ibiza club prices, BOO.

We stayed at Takkas hotel (I don’t have any pictures) but if you are planning on going to Ayia Napa the hotel was so much fun, right near all of the clubs, and had a great atmosphere.

Like any stereotypical girls holiday, we had some costumes to wear on our nights out.


TAKE A LOOK:


Ayia Napa

Firstly, we had  our Ayia Napa tops printed back home. We wore them out on one of our first nights to a bar crawl run by the hotel. We were so happy we went to this as it gave us the opportunity to meet some other people staying at our hotel, including our favourites from Bournemouth & Wales!

Hooters

Next we sported some orange shorts, a tan and a Hooters top!

Baywatch


For my 21st Birthday we wore Baywatch costumes but unfortunately did not do any life saving. (We are not strong swimmers).


Finally, we attended Kandi beach party which is held on a secluded part of  Nissi Beach. One of the best things was that you all got given tops to wear! Who doesn't love to dress up?


If you are planning on going to Aiya Napa, you MUST go on the Fantasy Boat Party, apparently it was one of FHM’s top 10 things to do before you die….and I agree. I’m not a fan of being on a boat for very long, but the time flew by and was one of the best experiences of my life. It was a constant party with amazing music and a bunch of very chatty holidaymakers! Also….there are a lot of games, most of which are not appropriate to talk about on a blog (Check out the YouTube video’s and see for yourself).


Hope you have enjoyed reading this post! I am working on a few nail posts at the moment so keep an eye out for those :) 

Thursday 5 April 2012

Multi Chain Hand Bracelet


This Topshop hand bracelet is my new favourite accessory. It glams up pretty much any outfit, and can be worn with either gold or silver jewellery due to the different coloured chains. I love the multi chain look as it is very unique and really is a “statement” piece.


Topshop currently have lots of different hand bracelet designs in stock, so here are some of my other favourites/future purchases:


Multi Chain Hand Bracelet- Topshop £12.50 
Some images taken from Topshop website.

Saturday 31 March 2012

Caviar Manicure Anyone?


NO... I am not talking about the stuff rich people eat (massive eugh). I am always seeking out the latest nail trends, mainly because I love nail design and I love spending money. Anyway, I have recently come across a 3D trend which I KNOW is going to take nail design by storm in the near future. NAIL CAVIAR!


Want a nailvarnish that looks good enough to eat? One that looks just like an iced doughnut covered in hundreds & thousands?....me too! The textured top coat is a new innovation from Ciaté which is a famous UK brand.

The new 3D pears are available in 3 colours:

Multi Coloured

 Black

White


The product is already sold out... BOOOOO! I will get my hands on some ASAP. I am struggling to choose which colour is my favourite so I think I will have to buy them all.


To Remove: Easily comes off with regular nail polish remover.
Full Directions can be found inside packaging.
Caviar Pearls- £18 by Ciaté 
Images taken from Google
How to Apply- Taken from- http://www.ciate.co.uk/caviar-manicure-how-to-apply

Tuesday 27 March 2012

Kardashian Kolor by O.P.I Nicole Nail Polish


OMG I am a HUUUUUGE fan of the Kardashian’s, so when I saw that they had their own nail polish range with O.P.I I knew I had to have it.


There is something for everyone in this range, and it isn't a small bottle! Didn’t think it was possible to make this range any cuter?......

Each polish incorporates a Kardashian lady with a quirky twist. Take a look:


At £9 a pop, and being a poor student, I  could only afford to buy one polish. I chose my favourite almost immediately as you can see below:


 (Pictures aren't that great, the varnish was so sparkly it caused a glare!)


I chose this polish (Shade: Rainbow in the s-kylie) as the colourful glitter looks almost holographic, resulting in what looks like a minx finish. I have had so many compliments on this polish and cannot get enough of it. It is easy to apply and quick drying. To get this look I used two coats of polish and a clear top coat. 

If you were to name a polish after yourself, what would it be called?


Nail polish- Asos £9
Some images were taken from Google.

Friday 23 March 2012

River Island- Tropical Shorts

I purchased these shorts a few weeks ago but I have been such a busy bee at Uni lately that I hadn't had time to blog about them. So….here they are!


These shorts were a BARGAIN; they are perfect for summer and have quickly become a wardrobe favourite. The contrast of the bright pink and green upon the black background makes the pattern vibrant and a “stand out” piece. I opted to wear the shorts with a nude coloured top, but the shorts make it easy to mix & match with most things. 

What I love about these shorts is that they can be taken from a daytime- night time look. I plan to wear them on a night out soon so I will do another blog post about how I make it a more evening piece. Watch this space!

Thanks for reading! x


Tropical Shorts- River Island £20

Thursday 15 March 2012

Marine Glam Nails


Here is my newest nail design! This one I actually did myself, the gems took a while to apply but I am extremely happy with the final result. I am now going to talk you through how i did it.


YOU WILL NEED:
  • Nail varnish (I used Topshop nail varnish in shade Marine Scene)
  • Tweezers
  • Adhesive (I used one by RIO)
  • Gems (approx 100 for this design)


Step 1:
Paint nails & apply another coat if required. (With the Topshop nail varnish I only had to apply one coat as it is high in pigment and is quite thick).

Step 2: 
When the varnish is completely dry, apply a thin layer of adhesive. This is not as strong as nail glue and gives a sticky texture. I am sure regular nail glue works just the same; however it tends to dry the nail which does not give the same glossy finish.

Step 3:
Using a pair of tweezers apply the gems to the nail wherever you want them. When all of the gems are in place, apply a layer of the adhesive over the top (It dry’s clear).

Step 4:
Ensure that the glue is completely dry and that you can no longer see the white glue colouring. When this is done, apply a clear top coat…wait to dry…AND YOU ARE DONE!  

If you have any further questions feel free to ask!

Tuesday 13 March 2012

Bobbi Brown HEAVEN

On Friday 9th of March I went to my local John Lewis (West Quay Southampton) as I wanted a PROPER foundation that did not melt away after a few hours. There seemed to be a huge fuss over the Bobbi Brown counter so I went to see what was going on. A Bobbi Brown event was being held consisting of 10% off all purchases as well as makeovers being given by Bobbi Brown’s top American makeup artists. I JUMPED at the chance to get my makeup done by a real professional.

A friendly American woman named Sarah was very welcoming and talked me through how I could achieve the look I wanted…flawless & fresh. My main issue is my oily skin; she recommended using the Bobbi Brown Oil Control lotion before applying makeup, the lotion is oil- free and lightweight. The seaweed extract absorbs excess oil whilst the lavender extract works to reduce skin irritation…and it smells GREAT. You only need to apply a small amount and apply it the same as a regular moisturiser.


I was expecting foundation to come next, but instead she opted for the Bobbi Brown Oil-free Tinted Moisturiser. (Shade: Light tint). The moisturiser was applied all over my face just using light strokes with the fingers. The moisturiser made my skin GLOW!


When it came to foundation, she applied the Bobbi Brown Oil-free Foundation Compact. Instead of applying it to my entire face, she only applied the foundation to the areas where I had blemishes and un-even skin tone. I learned that compact foundations are much better for oily skin than liquid foundation as they tend to still become very oily. (Shade: Warm Natural 4.5).


I like to use a Stippling brush to apply my tinted moisturiser and compact foundation as it uses minimal product, gives an airbrushed look and allows you to contour your face. This brush should be used in a doting/dabbing motion instead of rubbing or brushing. (Cheap brand brush).


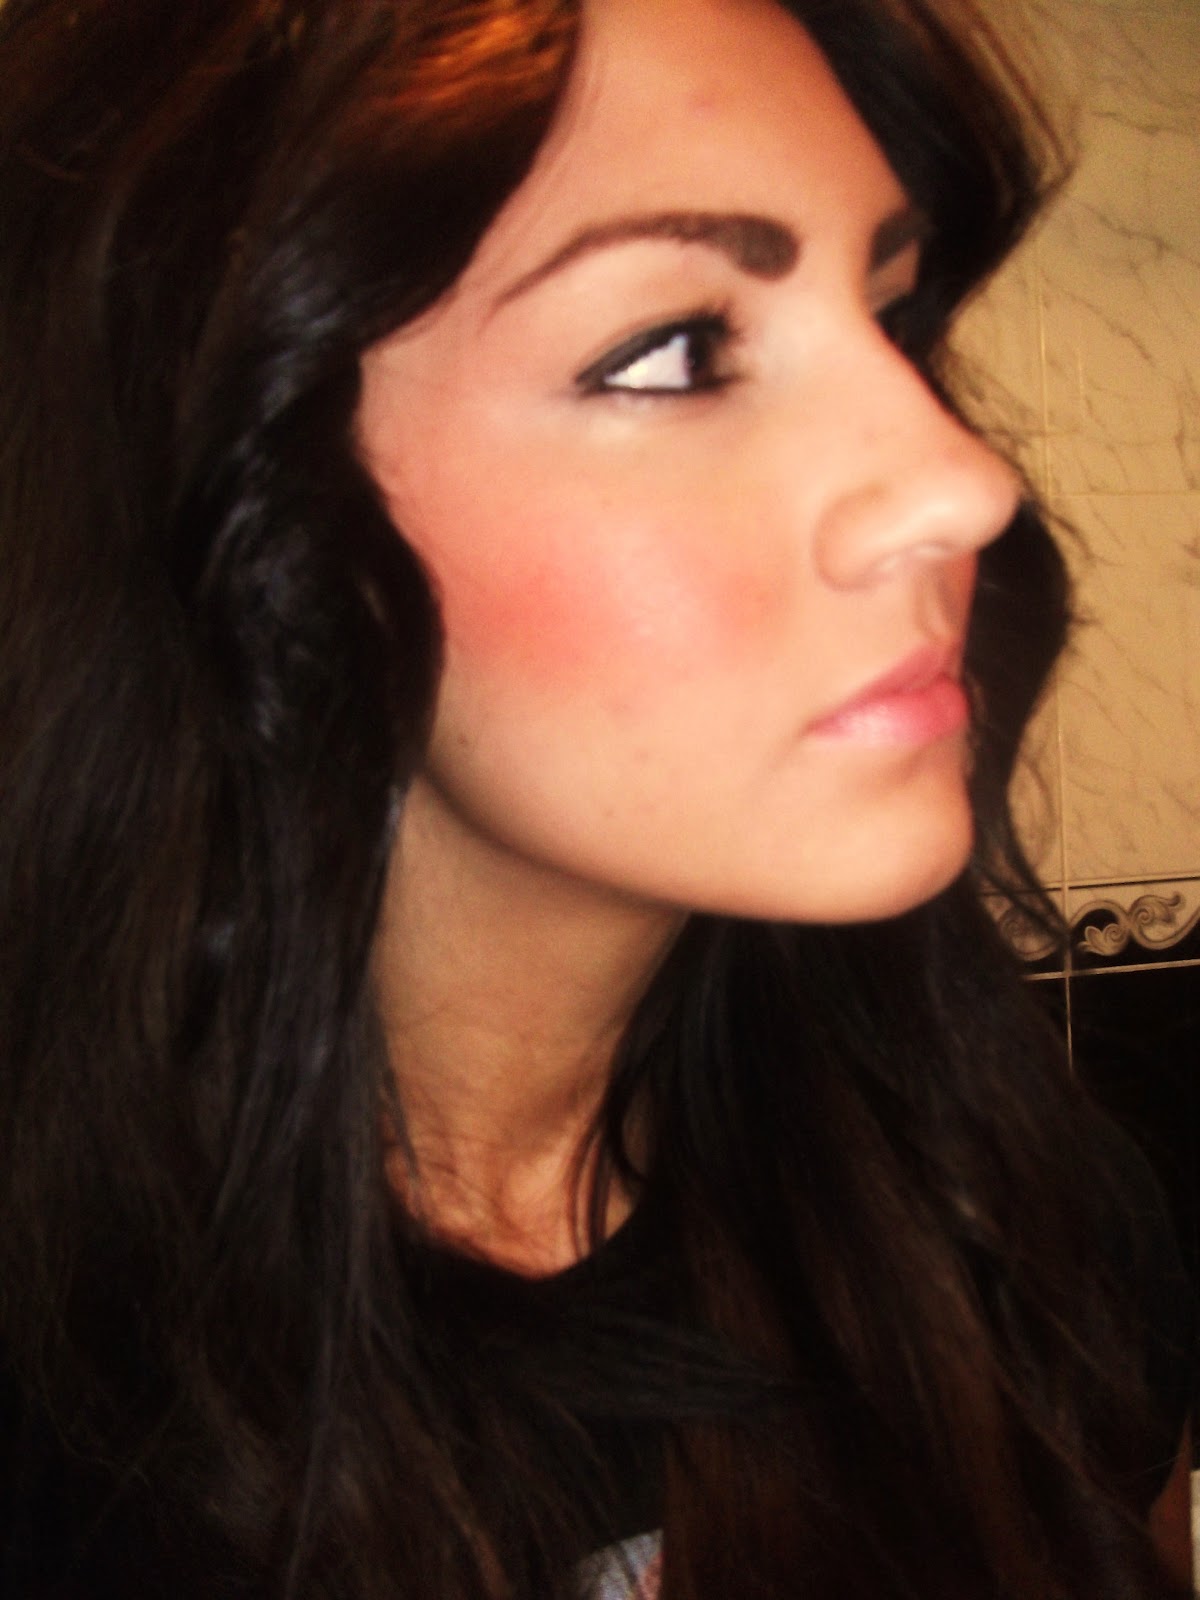
I was surprised at how good the colour match was to my own skin and how flawless my face looked using minimal foundation. I purchased all of these products, and after almost a week of wearing them I can say that it is money well spent. You really do get what you pay for and there is a real comparison to the cheaper brands.


Finally  she used an illuminating finish powder, nectar blush and a crystal lip-gloss.Unfortunately, being a student I could not afford these products, so I have had to make do with the cheaper brands until I can afford them.


I PURCHASED:
Bobbi Brown- Oil Control Lotion £32 (Without discount)
Bobbi Brown- Oil-free Tinted Moisturiser £27 (Without discount)
Bobbi Brown- Oil-free Foundation Compact £29 (Without discount)


Wednesday 7 March 2012

Shimmer Skirt


I am in LOVE with my shimmer skater skirt which I recently purchased from Topshop. The style and colour are very feminine which when combined with a skater design makes it a statement piece. I don’t feel it is a day skirt as it is slightly too shimmery, it is definitely an evening piece. The way the waistband sits is very flattering and elongates the body, so even if you’re short like me you can pull it off!


I paired the skirt with a side-strap bra top from Miss Selfridge, chunky jewellery and some tanned chunky heels to keep the colours quite neutral. To keep the neutral theme I opted for neutral pink shimmery lips and dark eye-makeup. Topshop are currently selling a number of pleated and skater skirts so there is something for everyone.

Recommendations: Wear shorts underneath your skirt, the tiniest bit of wind will reveal all!

Similar Products I NEED:

London Block Heel Sandals

Printed Skort


Topshop
Shimmer Skater Skirt- £32
London Block Heel Sandals- £65
Printed Skort- £28

Miss Selfridge
Side Strap Bra Top- £20